Jason M. Osborne
Here you will find some recently competed work and some ideas that I found helpful to complete this work. You are welcome browse this sharing space.
Topic:
Import Maple Output into Mathematica
In the spirit of sharing (and so that I don’t forget how) here is an example of how code from Mathematica and Maple can be encouraged to work with each other via MathML. I worked very hard to figure this out. I hope it will help others and save time.

Step 0 (Setup): Use tensorAddOns to create Matrix, Coords, and Mapping

Step 1 (The Goal): We want to import this Maple output into Mathematica

Step 2 (The Key): Use MathML as an intermediate.
Export Maple output to MathML as .txt file.

Step 3 (The MathML Output): This is the complicated MathML code for the simple vector expression (x,y,cos(x))

Step 4 (Set the Path): Set the path dir in Mathematica to where you want these .txt files to be ultimately stored.

Step 5: (Conversion) Run this code to convert Maple to Mathematica
(e.g. parentheses in Maple go to square brackets in Mathematica).

Step 6: (More Conversion) Run this code to go through a series of conversions to get MathML Mapping into Mathematica format.

Step 7 (Last Conversion): Convert MathML Matrix into Mathematica format

Step 8 (Differential Geometry Demos): Post conversion, run Adapted Frame to Surface to achieve the above Mathematica output.
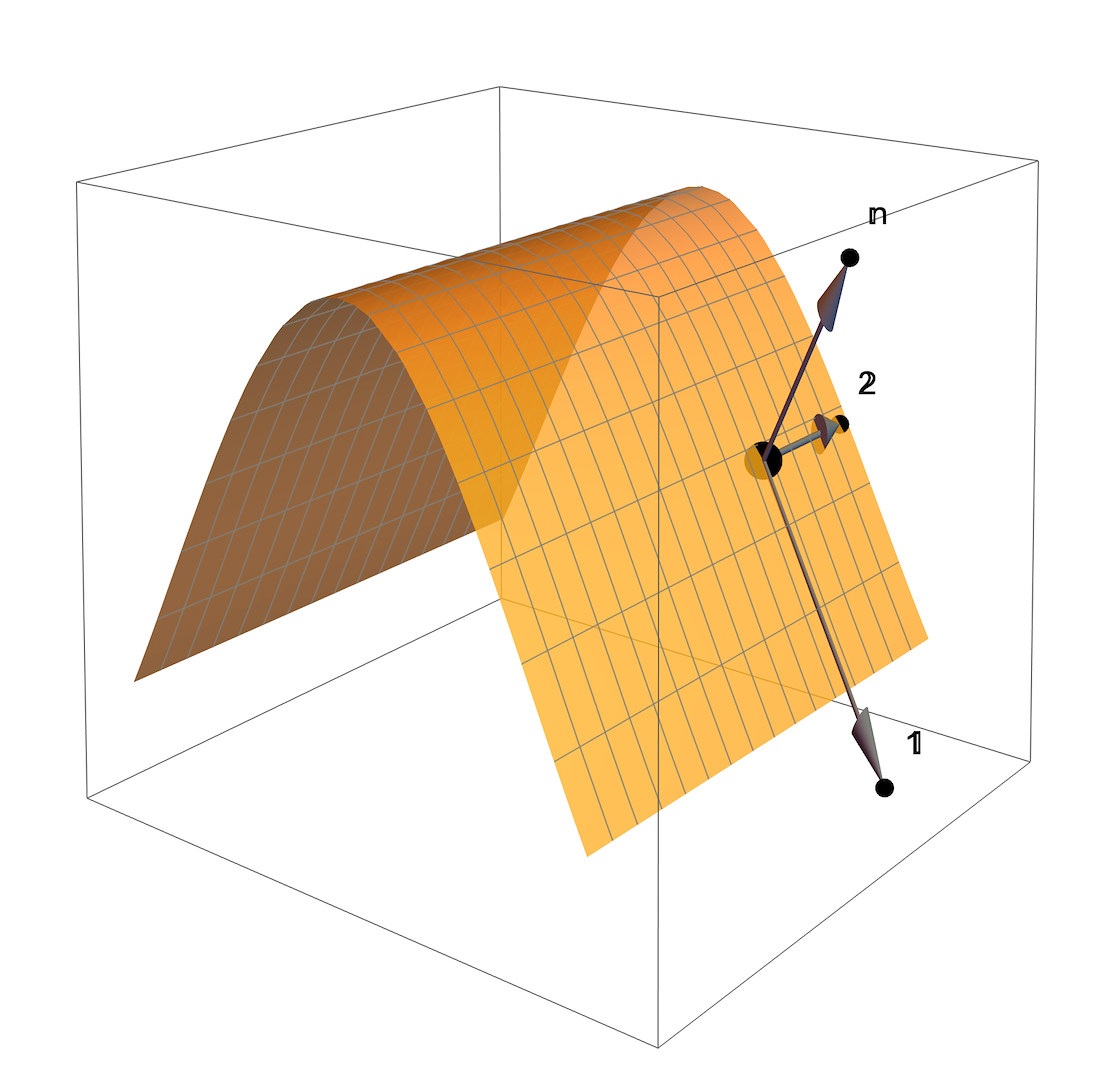
Step 9 (Finally A Result): Mathematica outputs a plot showing the Surface Adapted Frame to z=cos(x)
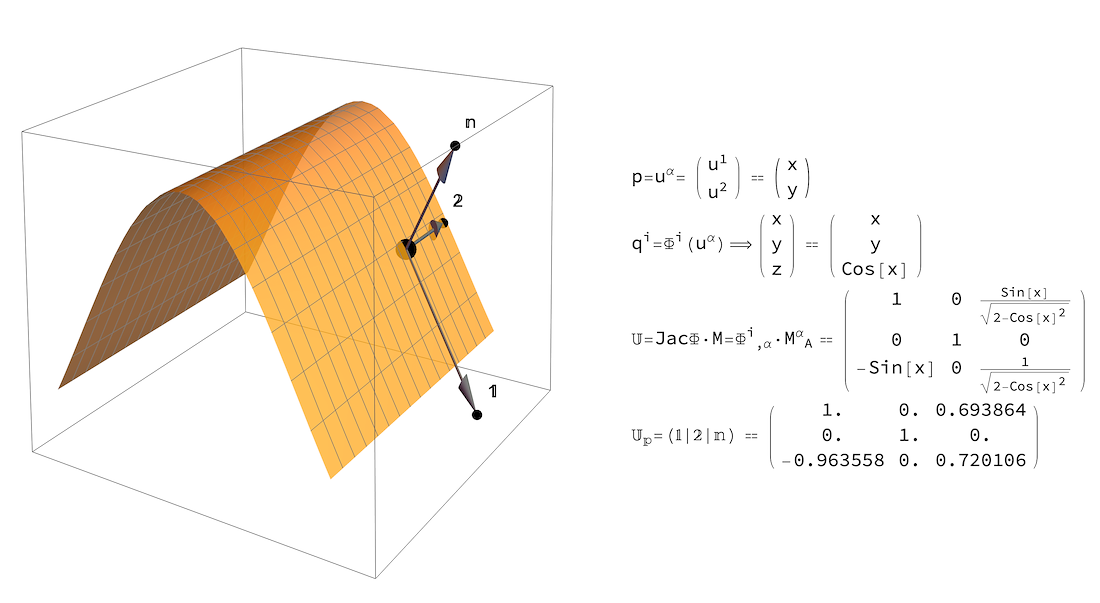
Step 10 (Plot and Data): Here is the Mathematica plot of a Surface Adapted Frame along with the corresponding data. I hope this helps.
Topic:
Encouraging
LaTeX to recognize the addition of new .sty or .cls files
In the spirit of sharing (and so that I don’t forget how) here is an example of how to make LaTeX recognize that a new .sty or .cls file has been added to your LaTeX distribution. Figuring this out took longer than I might have wished, so I hope sharing it here will help save others some time.
- 1. Let’s say that you are writing an article for a journal that has their own style file (.sty) or you have found a nice piece of code someone has written (like wrapfig.sty) and want to simply be able to add \usepackage{wrapfig} in the preamble of your .tex document to begin using the ability to wrap your text around a graphic/image.
- 2. You need to add the .sty or .cls file(s) of interest to the folder /usr/local/texlive/texmf-local/tex/latex
- 3. You now need to ensure that the ls-R file gets updated. To do so, open a Terminal window where you can issue the command sudo mktexlsr
- 4. I am sure there is more going on behind the scenes than I have indicated, but the 3 steps above work for me.
Topic:
Creating a Linked Table of Contents in Adobe Indesign
The graphic novel A Curvature Story was written using the tools Maple, Mathematica, LaTeX, Powerpoint, Photoshop, and Indesign. Getting all these tools working together was part of the challenge and the fun. One particular challenge was creating the linked Table of Contents. I found hints of solutions on the web, but figuring out my eventual solution took longer than I might have wished. So, in the spirit of sharing and so that I don’t forget how, and so it will help save others some time here are the steps behind my solution to creating a linked Table of Contents in Indesign.
Caveat: I am relatively new to Indesign so this solution might not be the most efficient or correct, but I have found it to work with the following troubleshooting steps outlined here.
(The Goal)
Create a Table of Contents
that links to pages within your
Indesign document.
(The Key) My solution requires two “layers”
seen in the image above as a blue layer
(main document content) and a red layer
(TOC layer). The text you type on the
red layer will become the copy of
the Table of Contents.

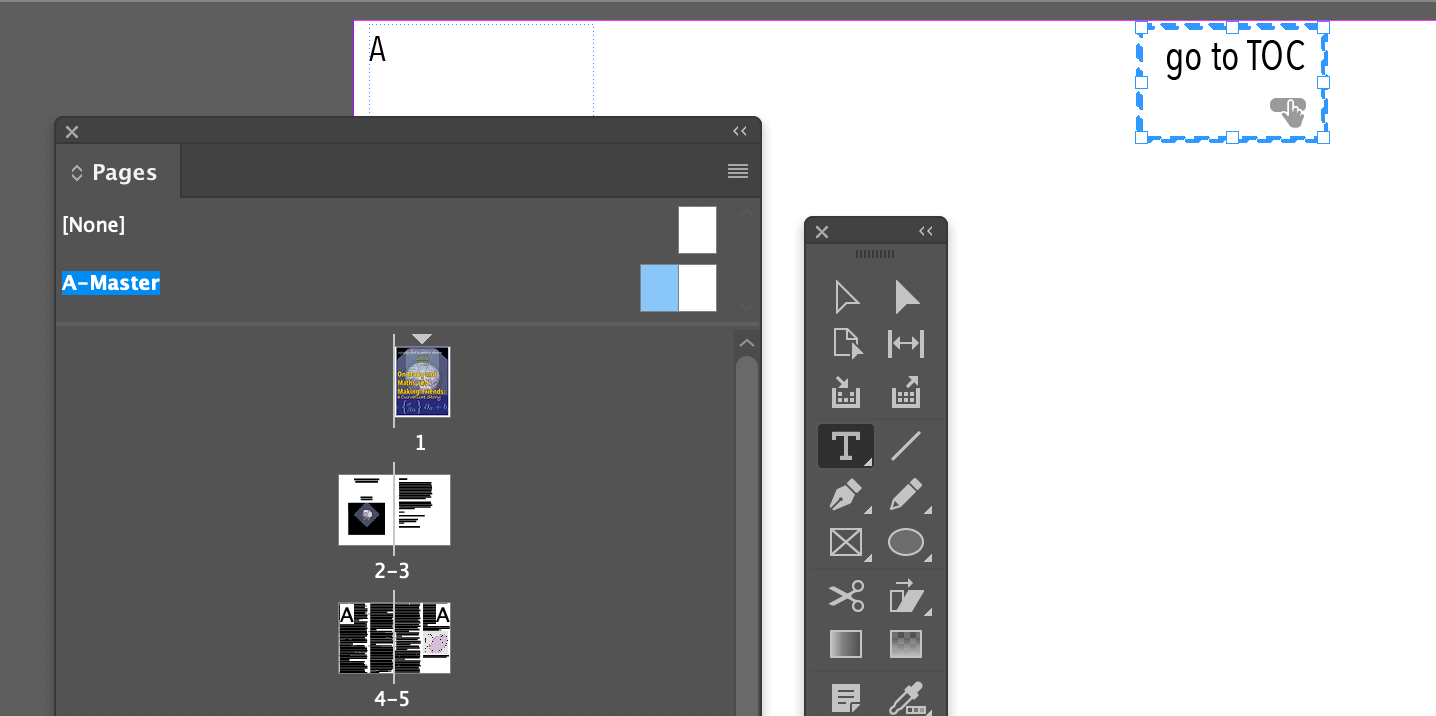
(Step 1, Create a New Layer)
From the Taskbar of Indesign,
enable “Layers” from the “Windows” menu.
You can use the “plus” icon to create a new
layer which I called TOCLayer. The type
in the red layer is set at 1pt and black
color so as to be nearly invisible
in the final document.
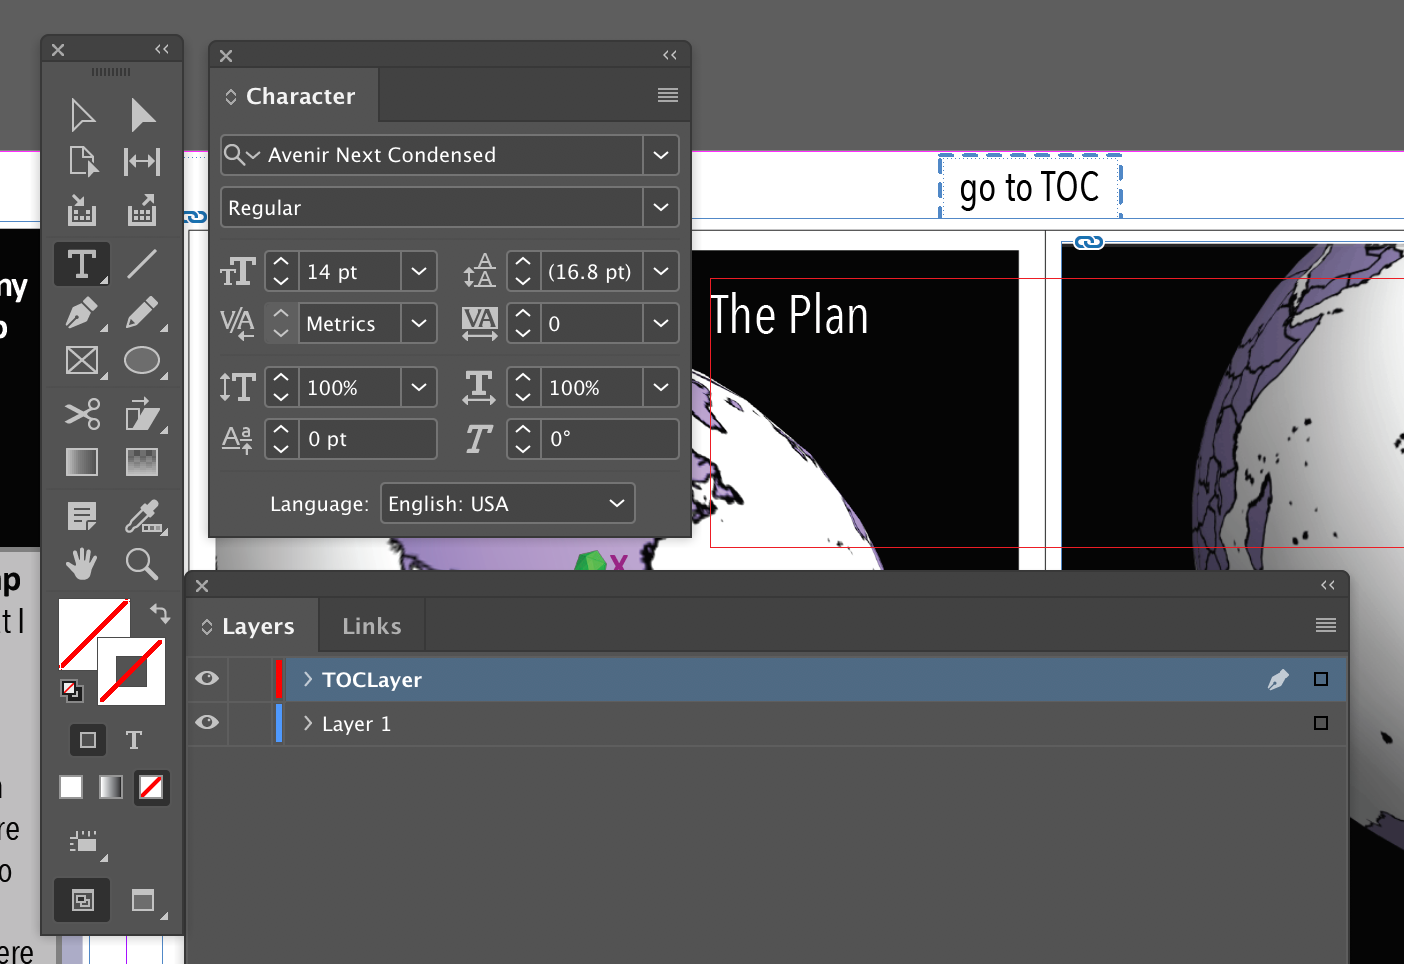
(Step 2, Use Type Tool, T)
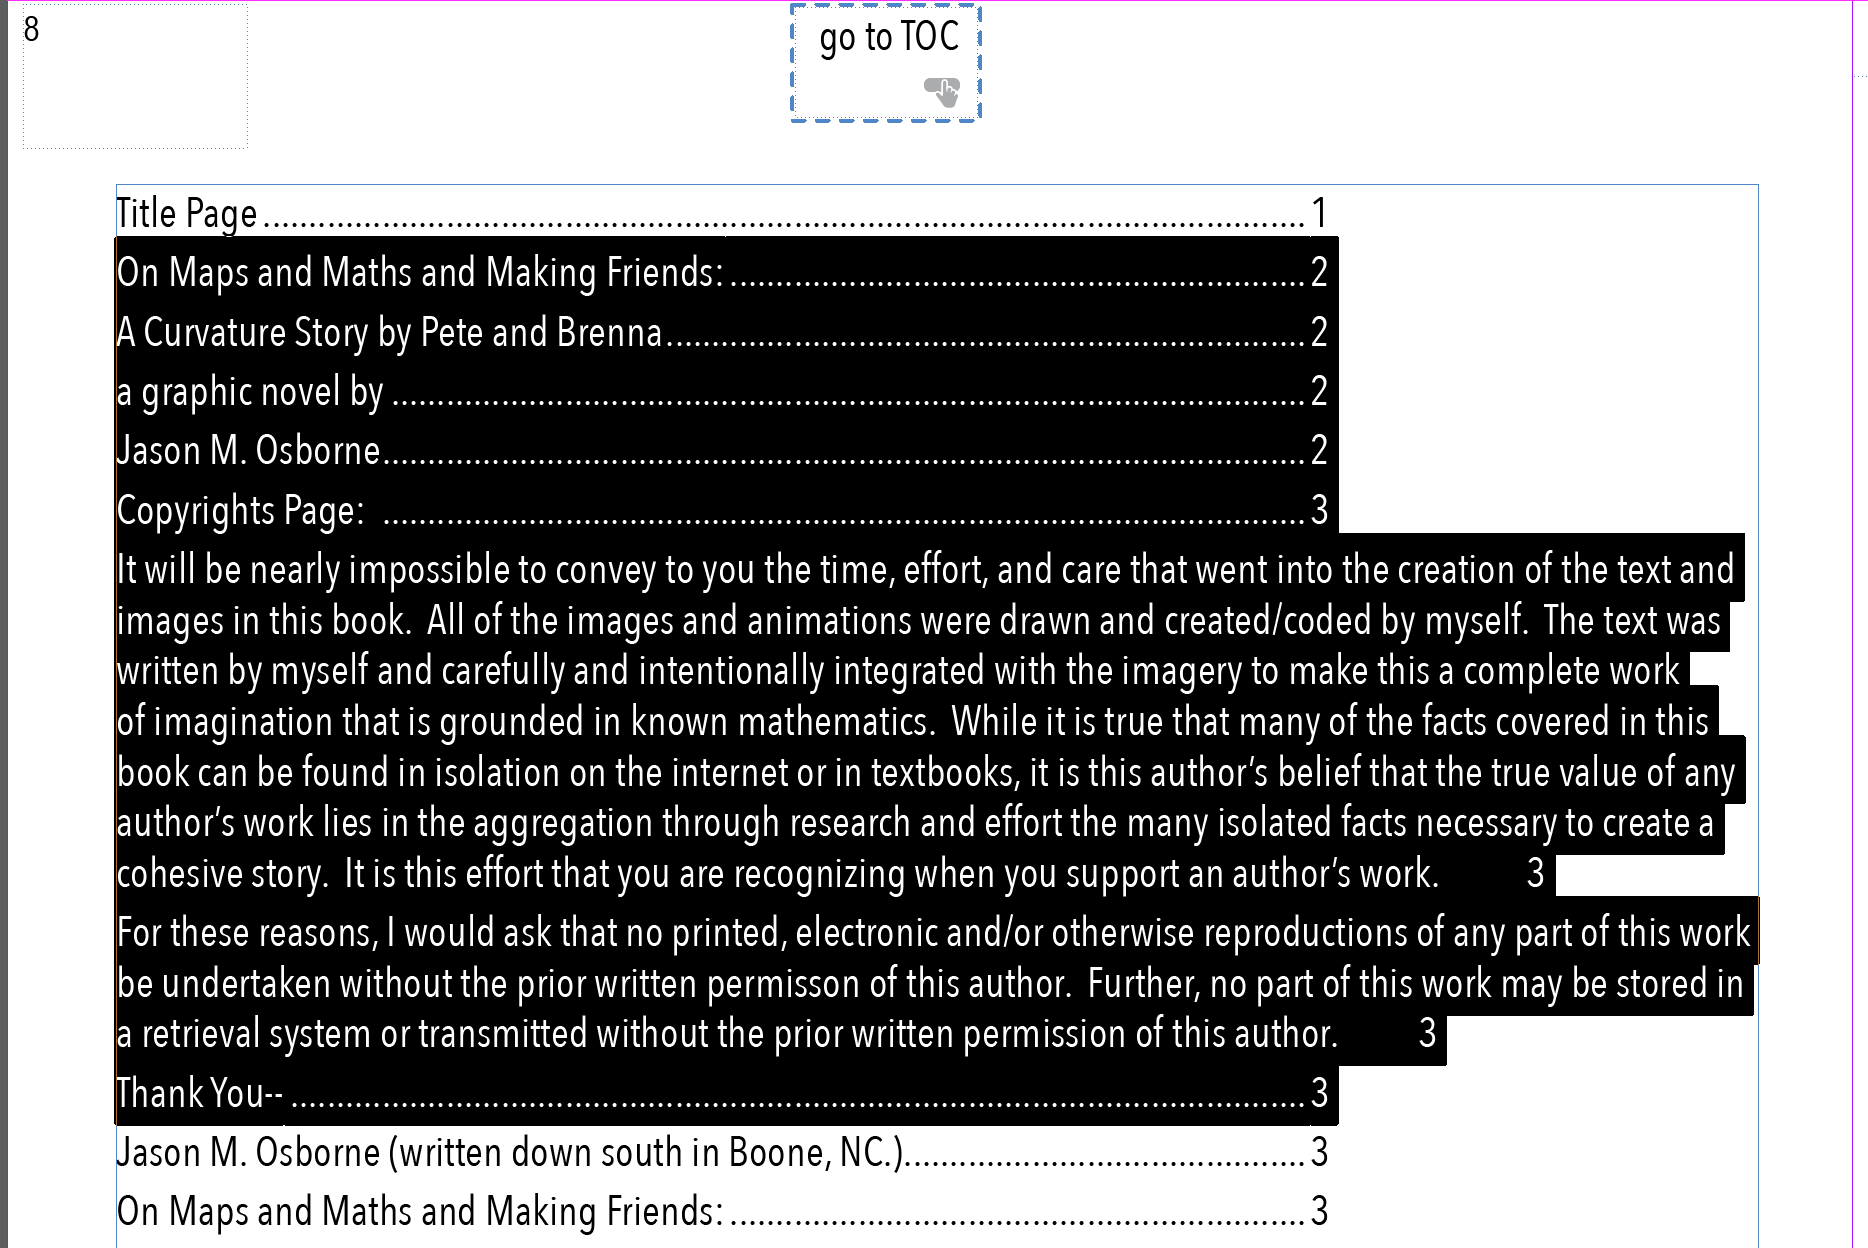
Using the type tool with the red TOCLayer selected, add type you want to appear in the TOC. In this case, the words “The Plan” will appear eventually in the TOC. When typing is complete, change font size to 1pt and color to black to make the copy on this layer effectively invisible.
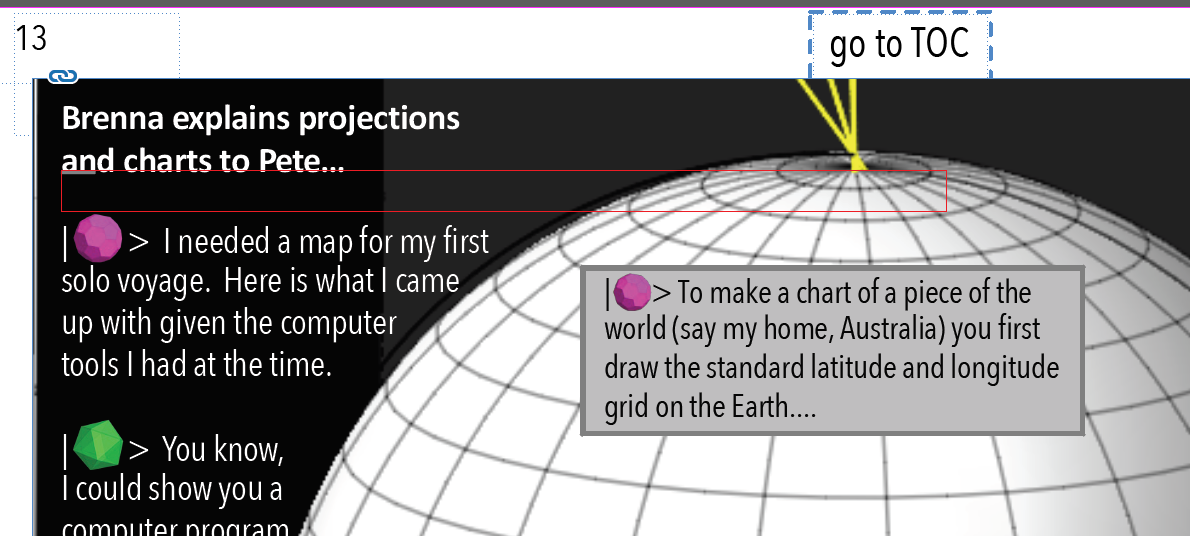
(Step 3, Repeat Step 2)
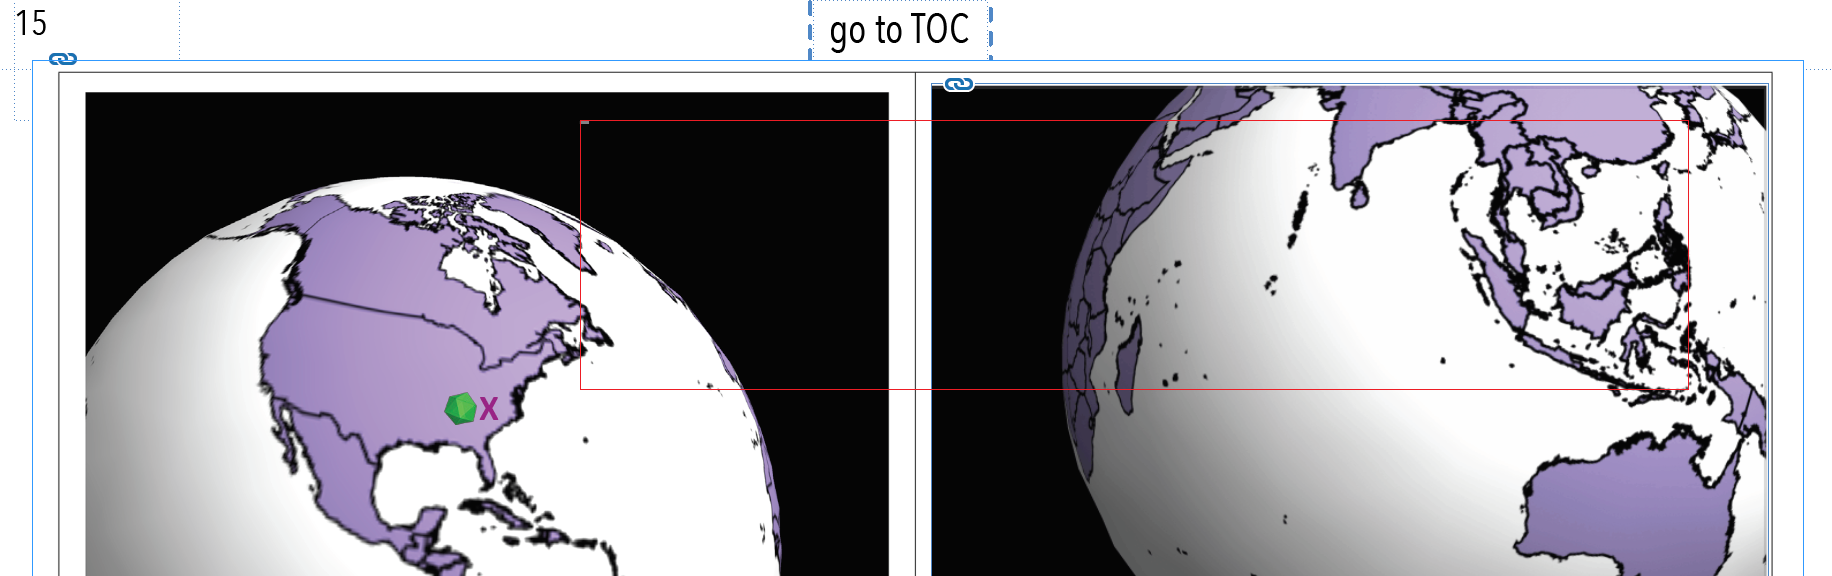
For each page of your document add type to the red layer with copy that you want to eventually appear in your TOC. Select a font size and color so the copy becomes practically invisible with the main content on the blue later. The copy in the red box for this page is “Brenna Explains Map Projections”.
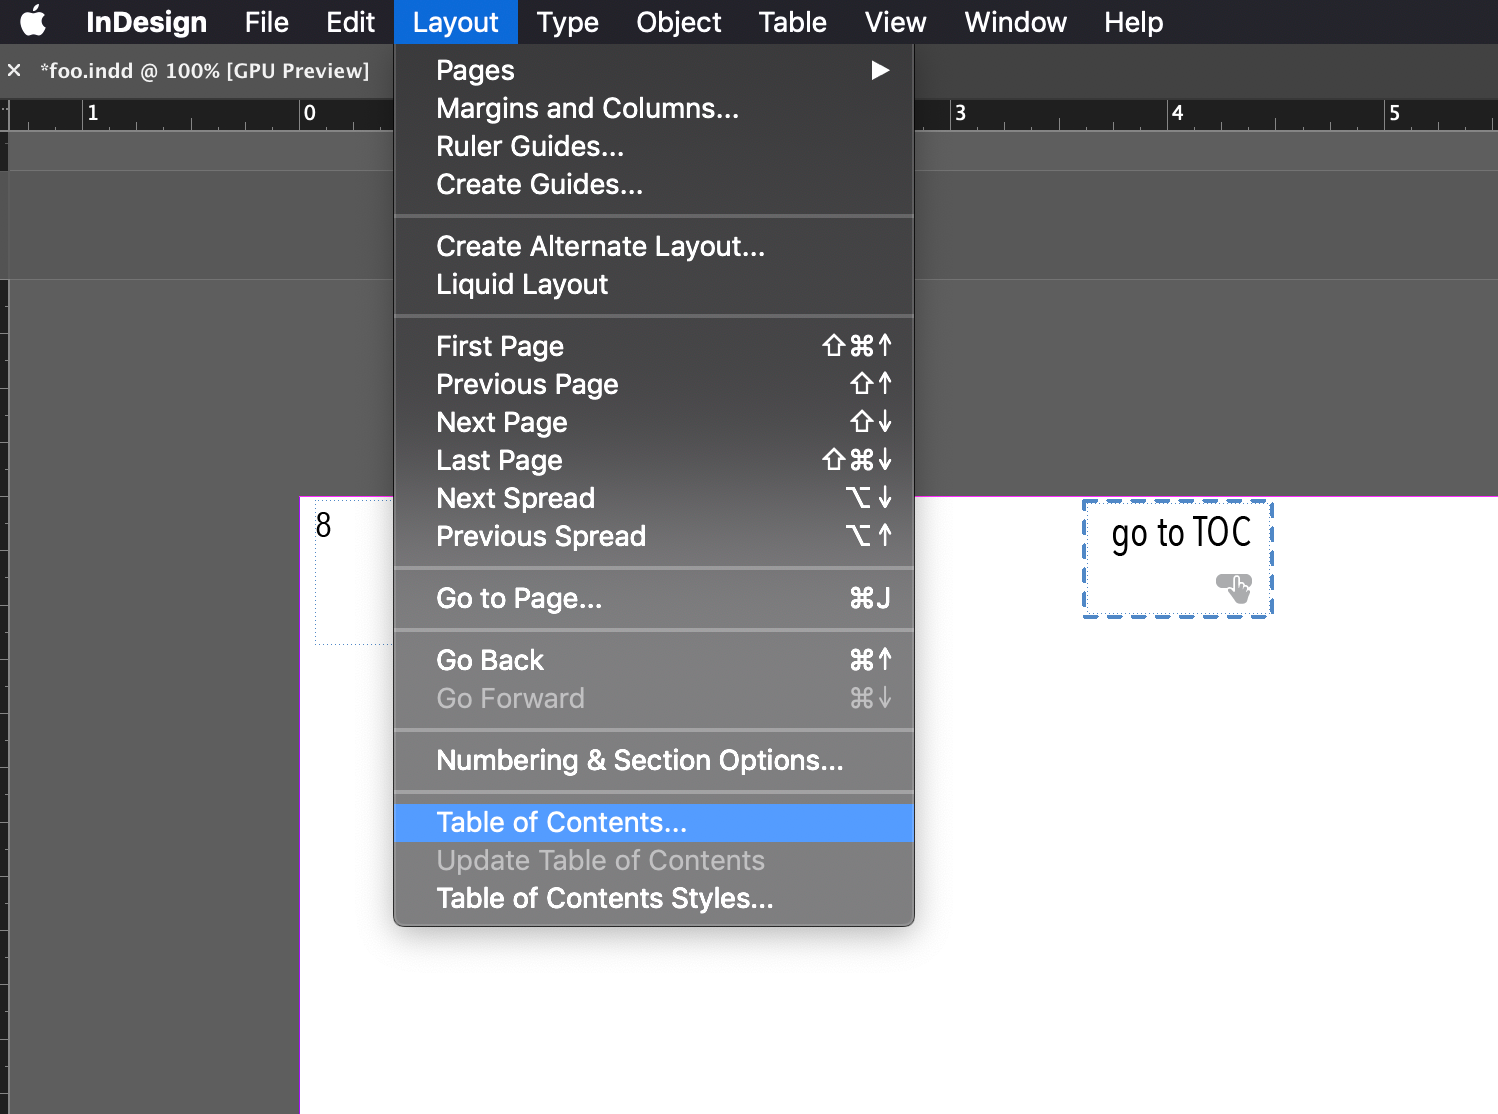
(Step 4, Create Table of Contents)
After you have added text on the red
TOCLayer to each page you want to
appear in the TOC, go to
Layout :: Table of Contents…
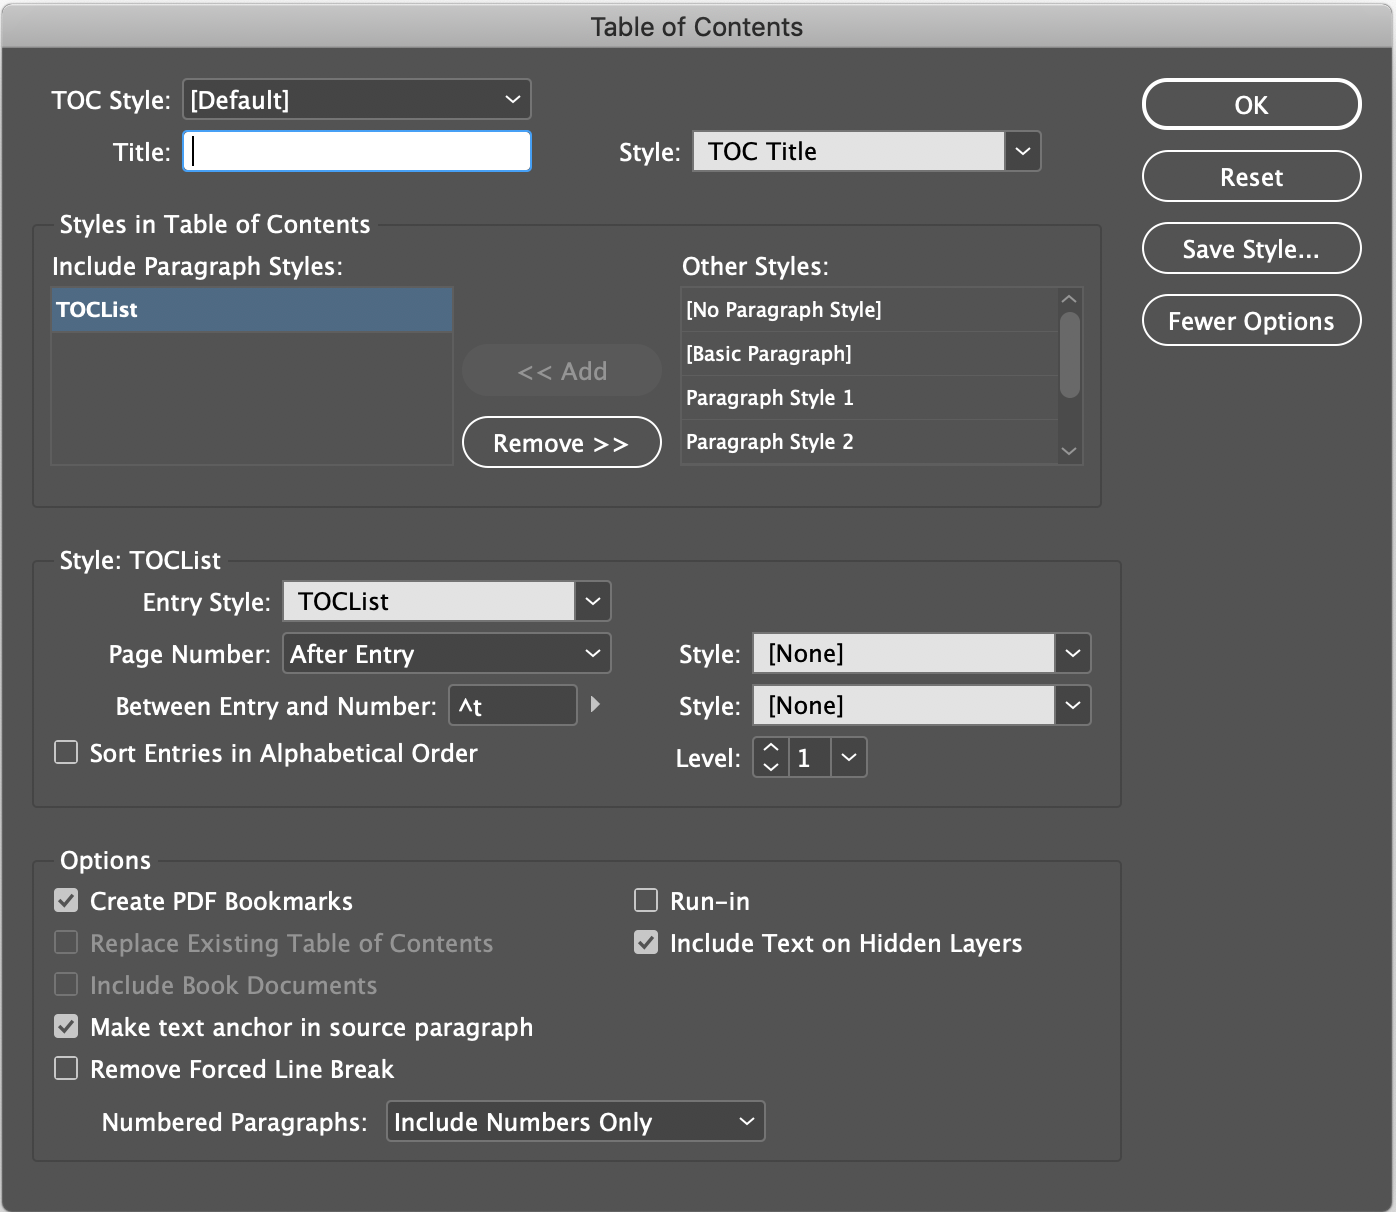
(Step 4 cont. Create Table of Contents)
…here are the options I used.
The key check box, I believe, is
“make text anchor in source paragraph”.
(Step 5, Clean up the resulting TOC)
Your cursor will load with content
then click to place text. Unfortunately,
extra text comes with the TOC creation,
and you might need to delete out
copy you do not want to appear
(highlighted in black).
(Step 6, Cleaned up TOC)
Notice the text “The Plan” and
“Brenna Explains Map Projections”
in the TOC that were created in earlier
steps. Keep cleaning up your TOC until
only the entries are left that you want.
(Final Steps: Linking back to TOC)
I wanted to be able to link back to
the TOC on each page of the final
ePub document. This was accomplished
via Master Pages, Buttons, and Hyperlinks.
(Final Step 1, The Master Page)
Using the Type Tool, I wanted
“go to TOC” to appear on every
left (or A page) of the
final ePub document.
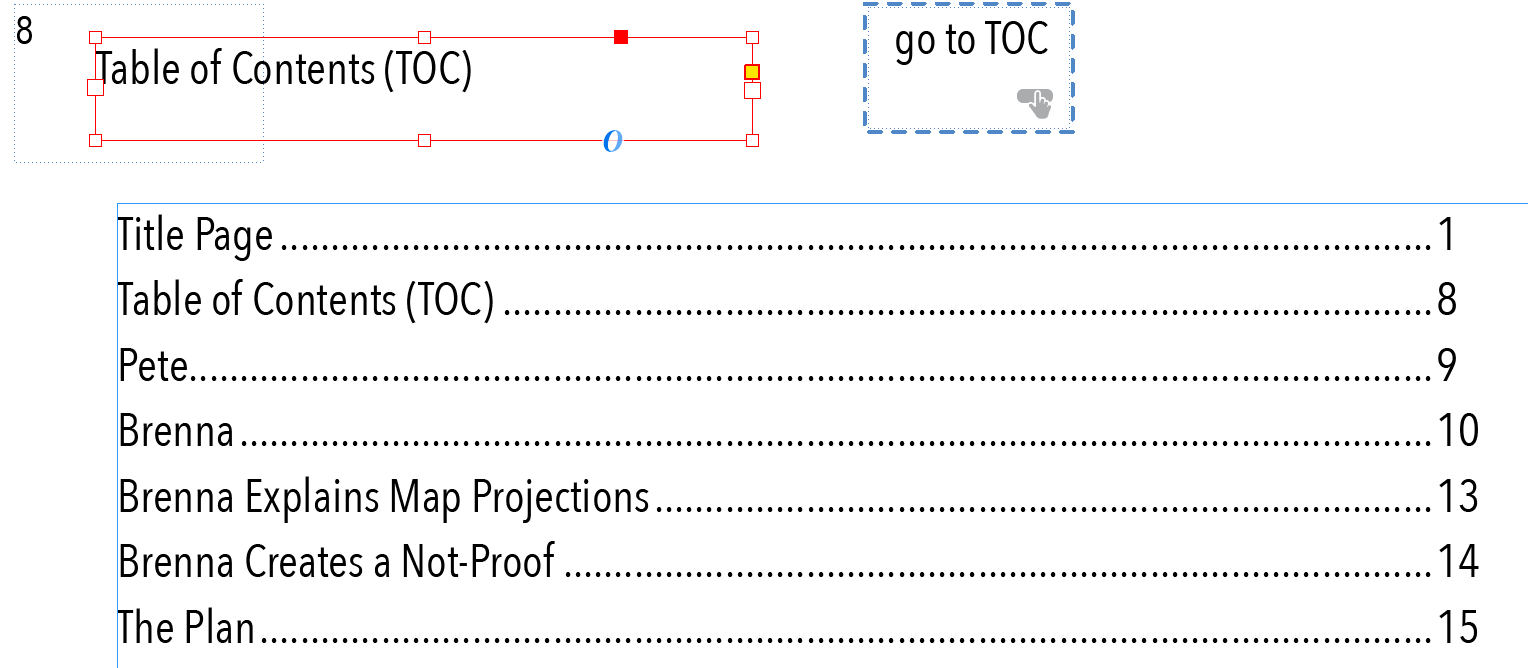
(Final Step 2: TOC page in the TOC)
Please note aTOC page is itself included
on the red TOCLayer and thus will appear in
the Table of Contents. In this case, the TOC
is page 8 of the Indesign document.
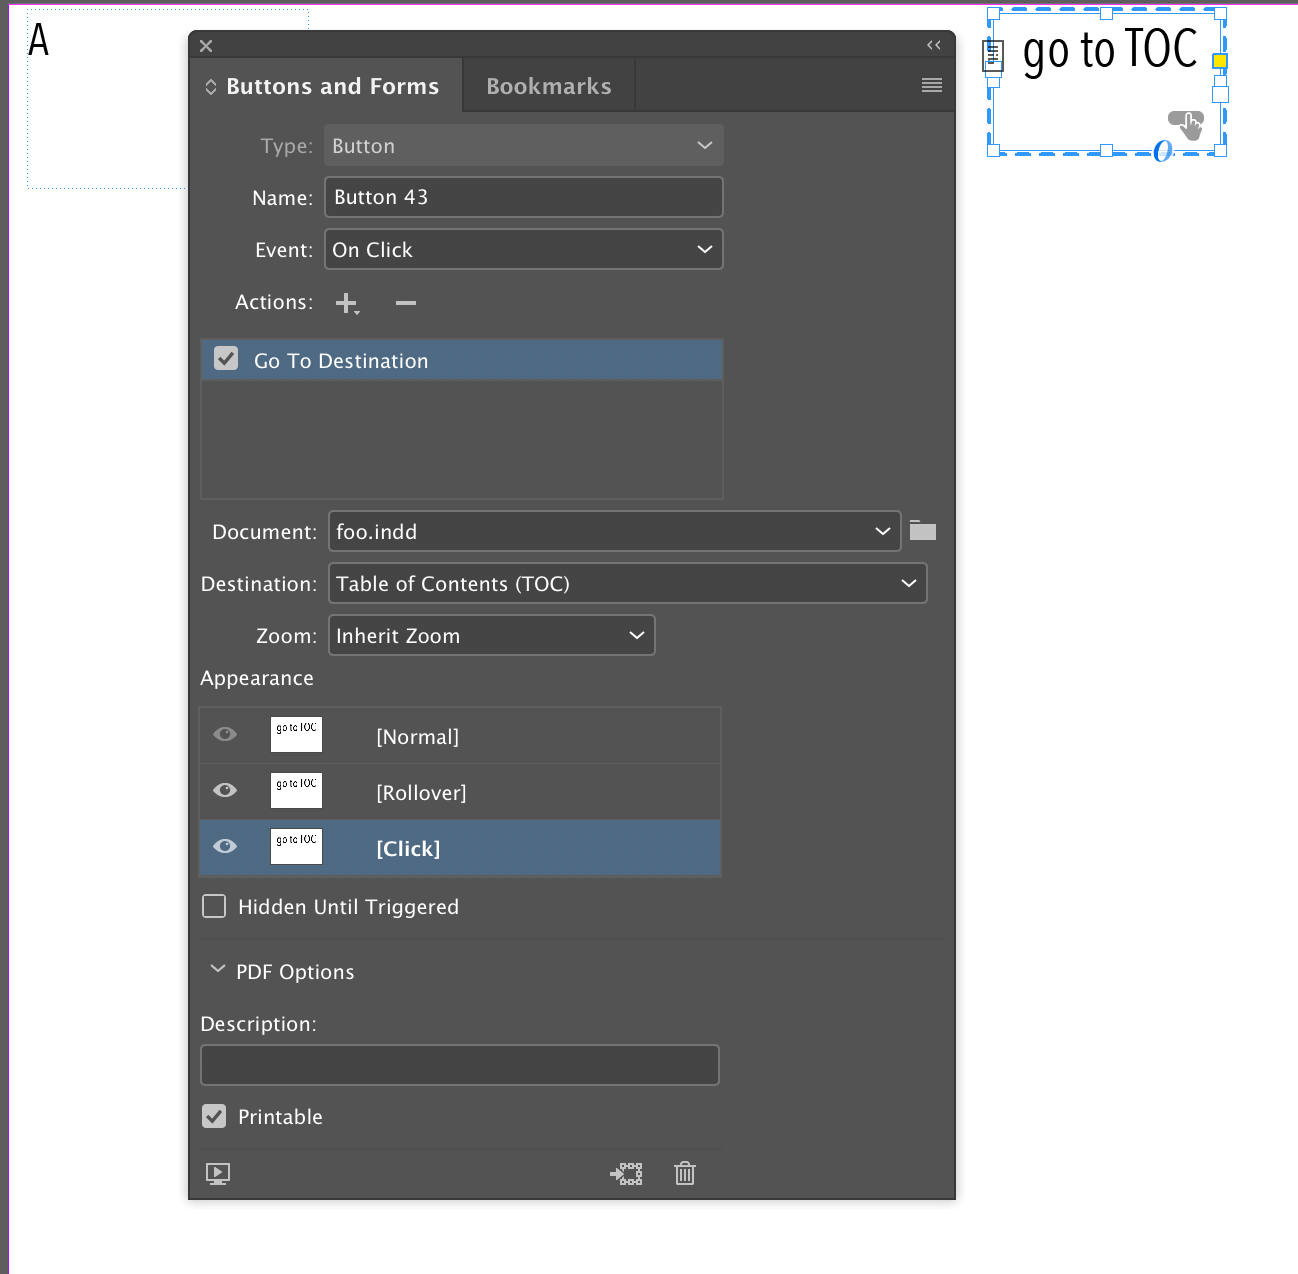
(Final Step 3, Attempt #1)
Turn the “go to TOC” text on the
Master Page into a Button using
Windows :: Interactive :: Buttons and Forms
with, event “On Click” and action
“Go to the Destination” set to the
Table of Contents (TOC) text anchor.
This button only sometimes worked in the
final ePub document. I don’t know why it failed.
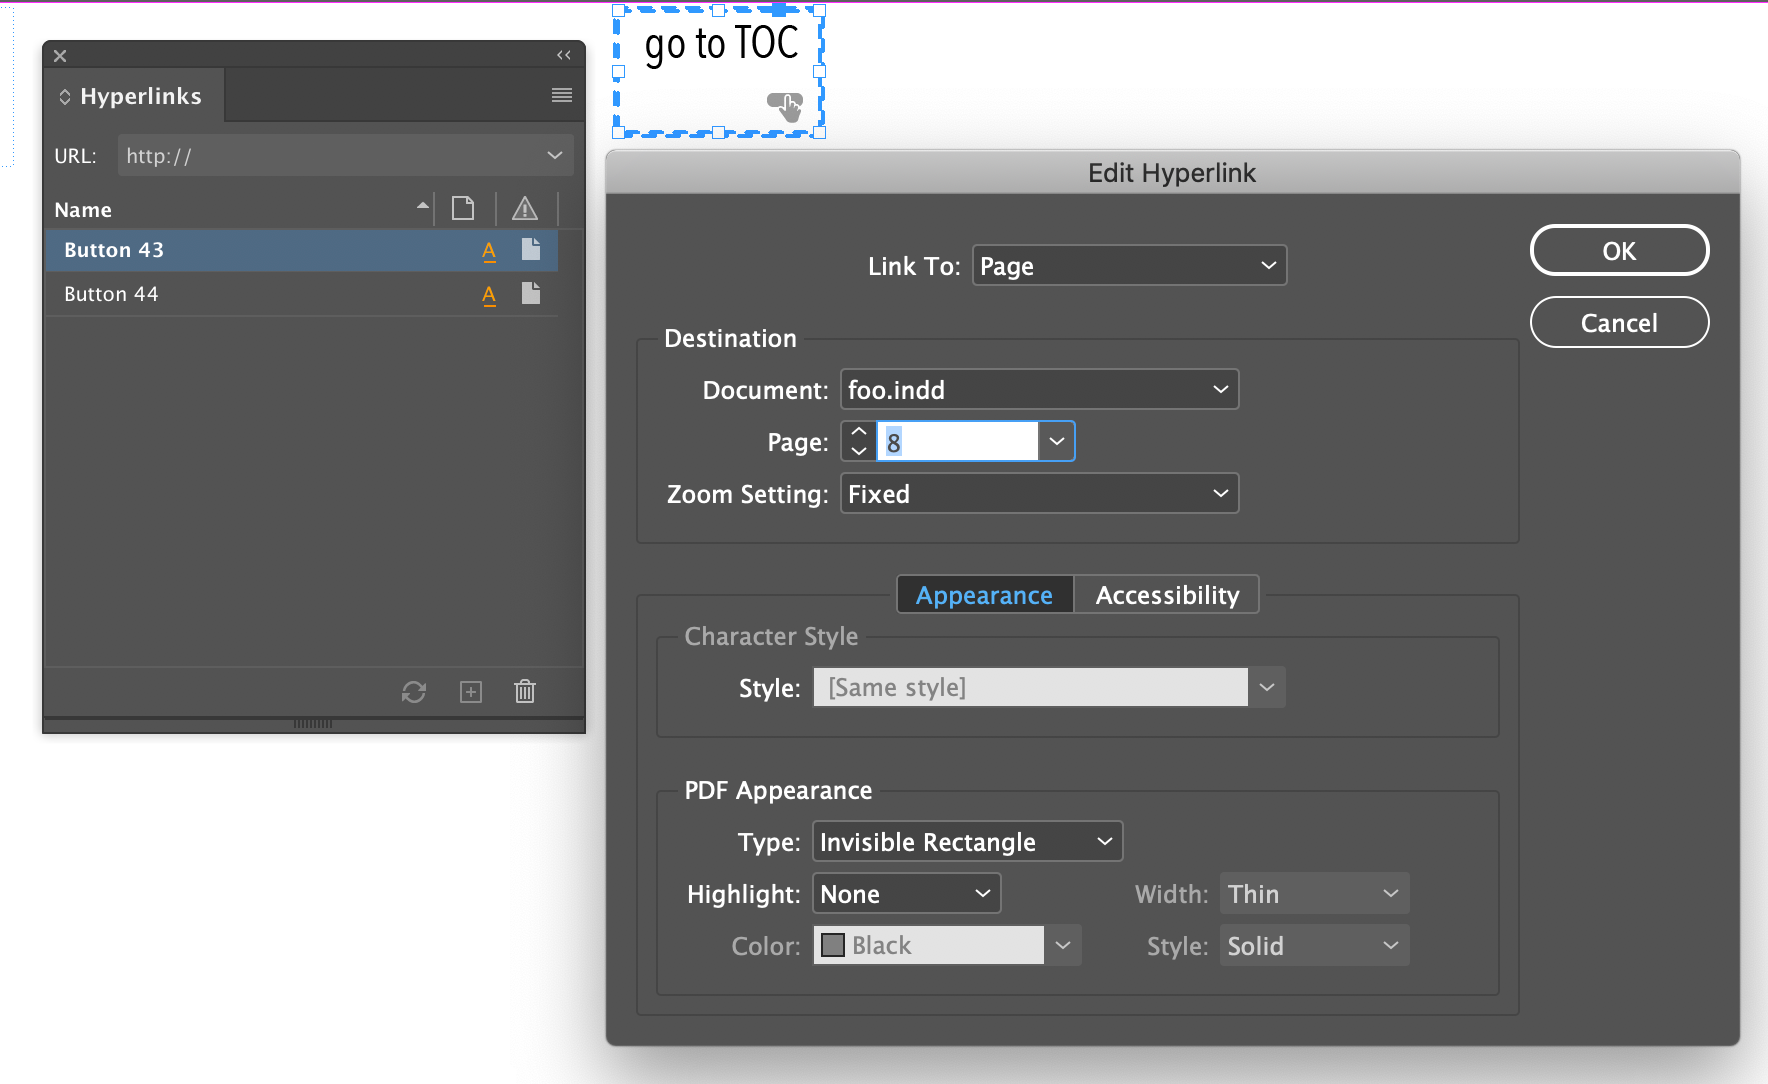
(Final Step 3, Fail Safe Attempt #2)
As a backup plan to the button action:
Windows :: Interactive :: Hyperlinks
double click the “go to TOC” button
(in this case 43) to link it directly
to a page (in this case page 8).
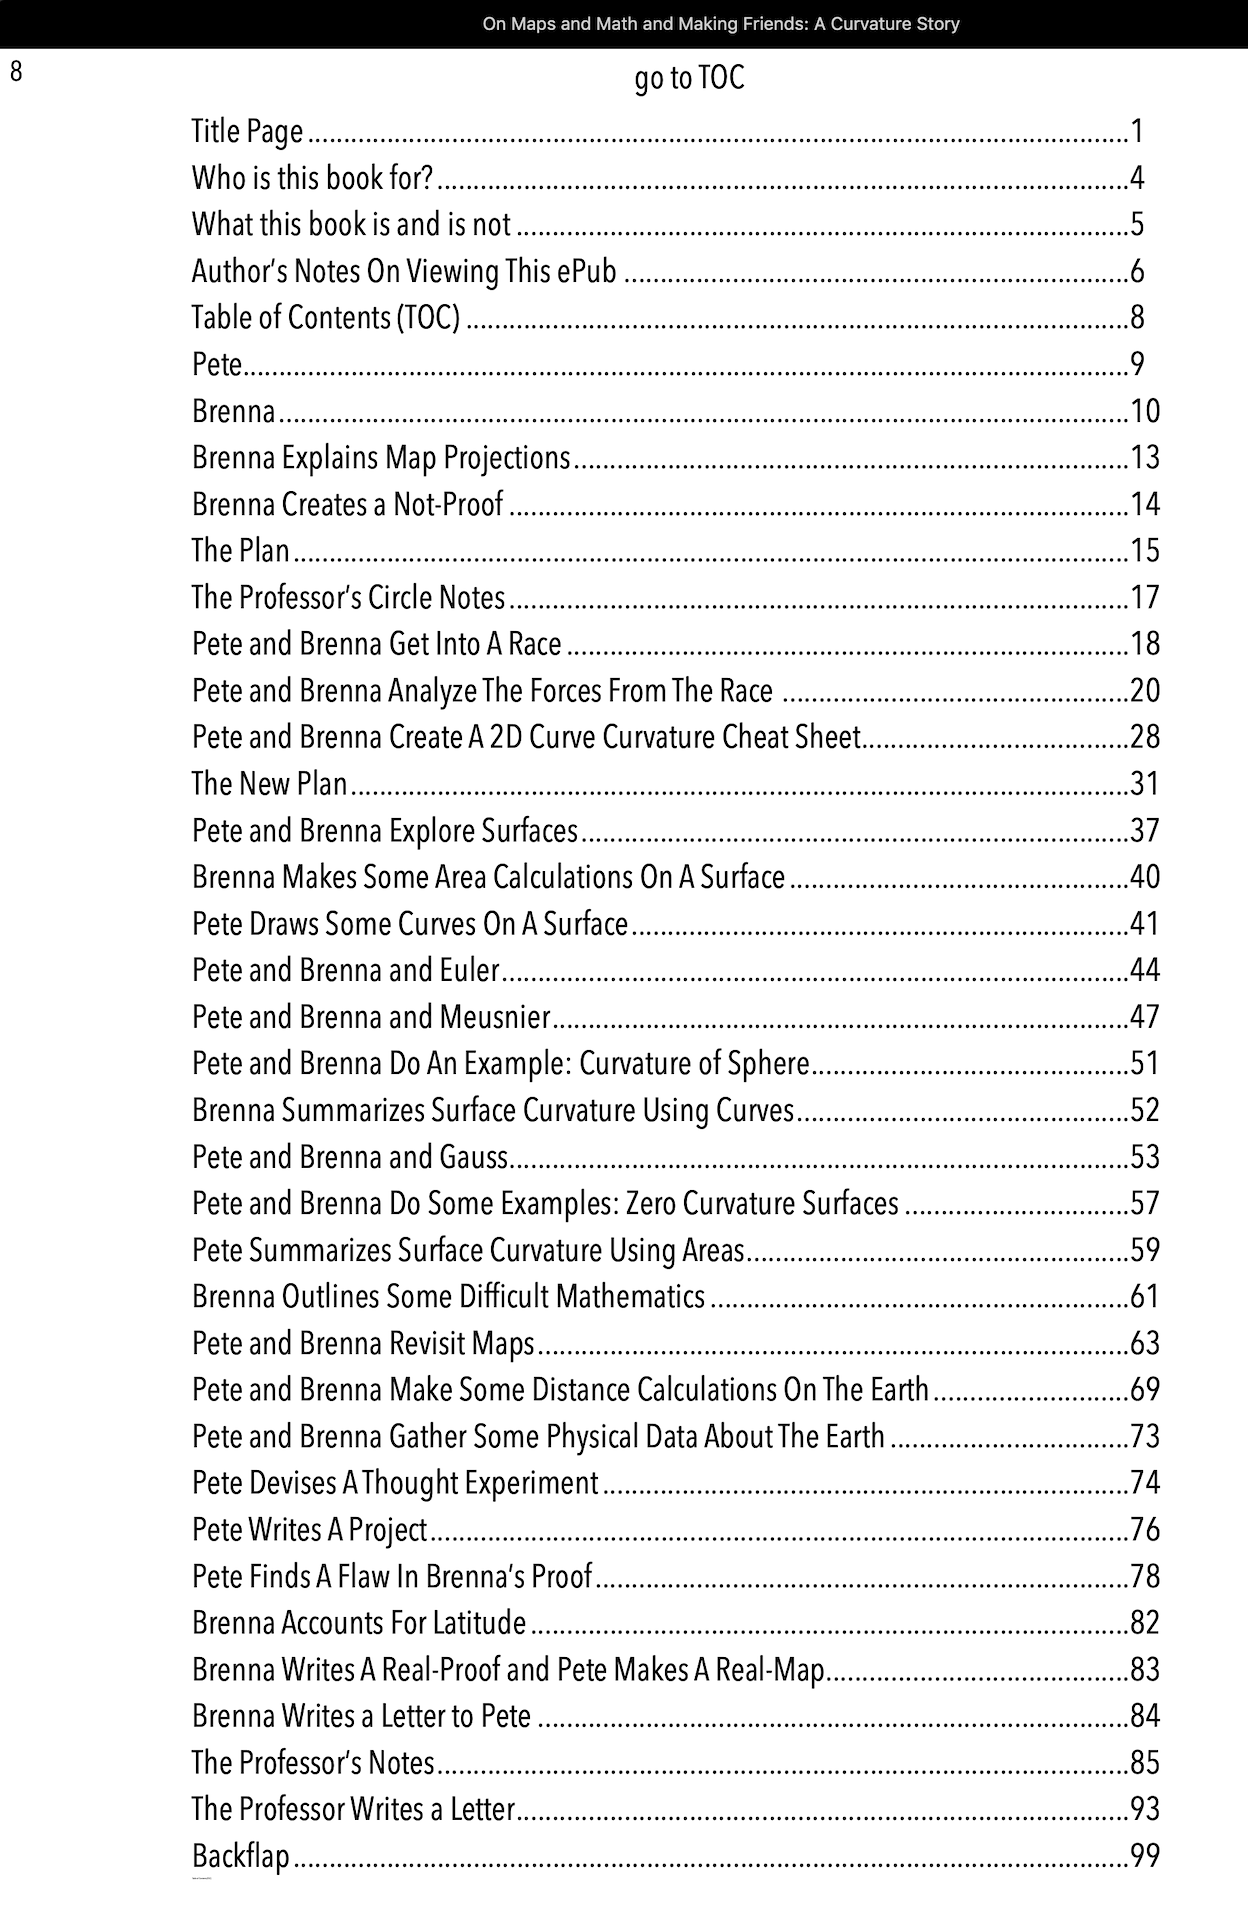
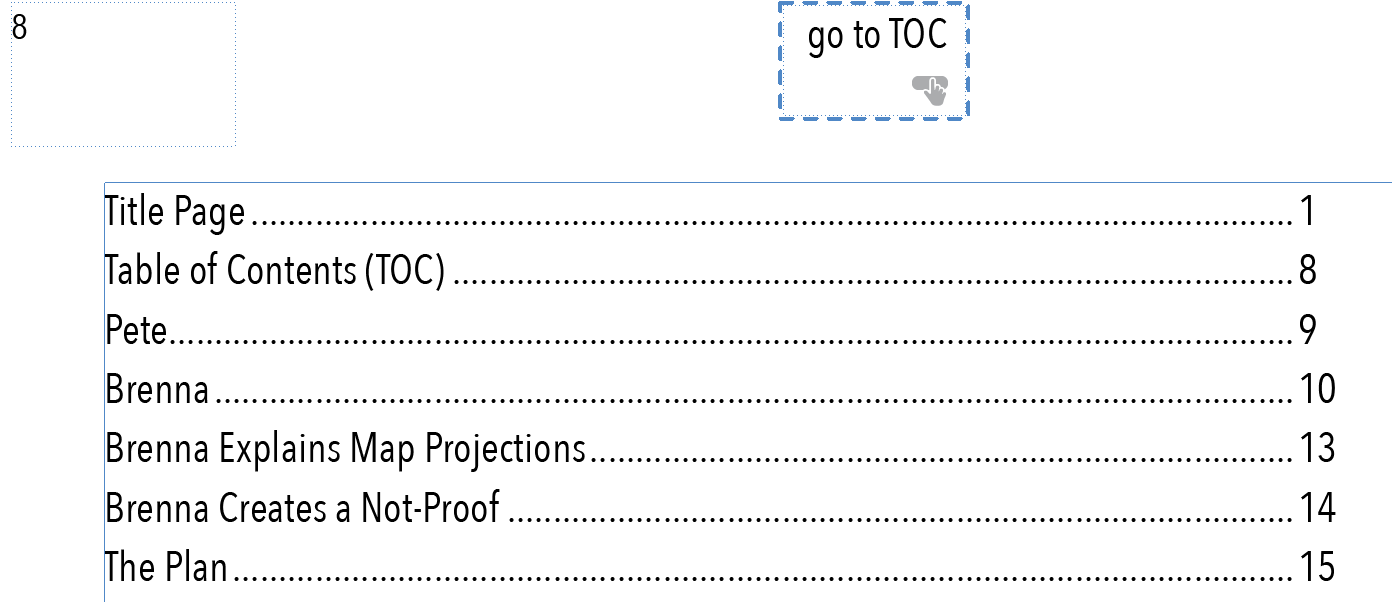
(Proof of Concept)
As we can see, making a linked TOC
in Indesign seems to require some
troubleshooting. Here is the Final TOC
of "A Curvature Story" which is now
available on Apple Books.